10 Teardrop Makeup Sponges: Dual-Use, Skin-Friendly
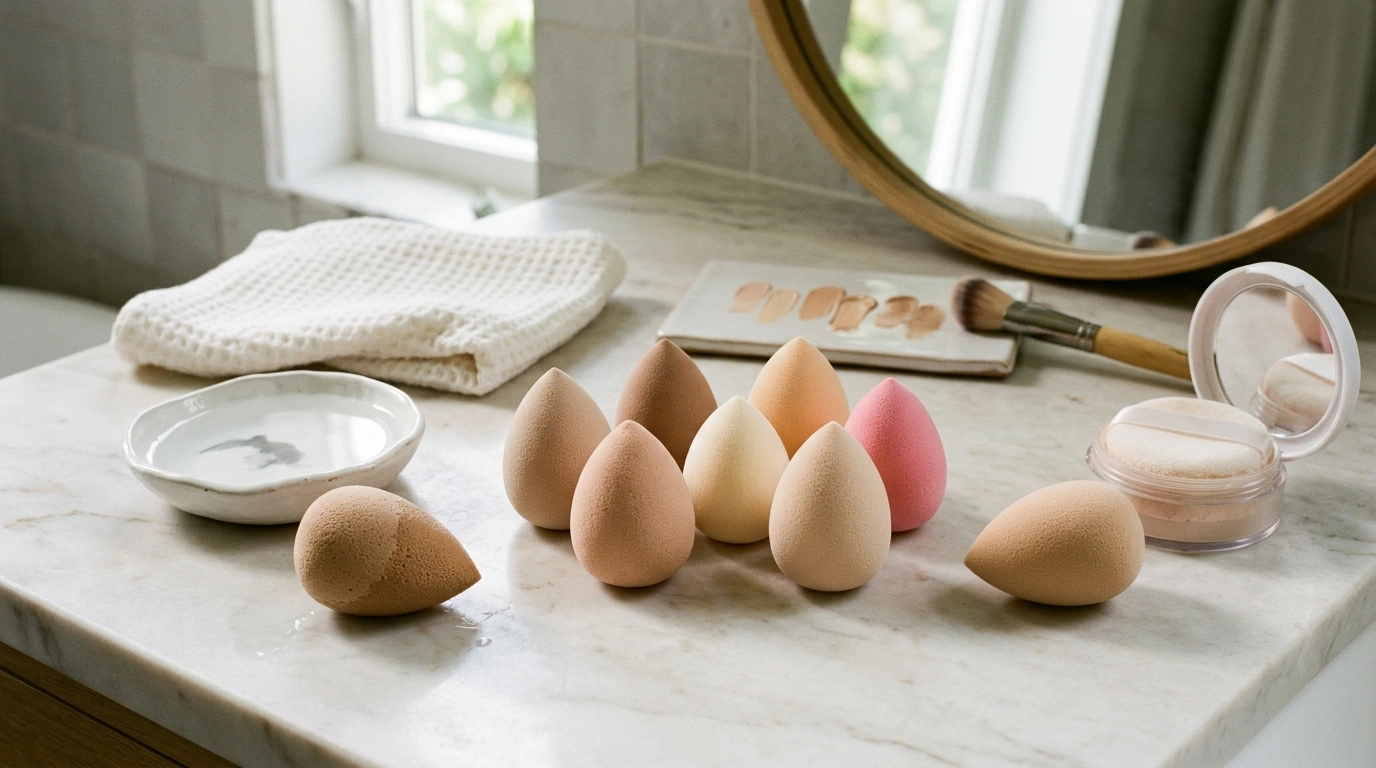
10-Piece Teardrop Beauty Egg Makeup Sponge Set – Dual-Use and Skin-Friendly
A good sponge set keeps everyday makeup fast, even, and comfortable on your skin—without wasting product. Our 10-Piece Teardrop Beauty Egg Makeup Sponge Set – Dual-Use and Skin-Friendly is made for both dry and damp application, so you can get smooth coverage with foundation, concealer, blush, and powder while keeping your routine gentle enough for daily wear.
What makes the teardrop shape so useful
The teardrop “beauty egg” shape is popular because it gives you two tools in one: a broad blending surface and a precision tip. That mix matters when you want coverage that looks seamless up close.
- Rounded base for speed: The wider end helps you blend larger areas like cheeks, forehead, and jawline with fewer passes and fewer streaks.
- Pointed tip for detail: The narrow end reaches tight spots around your nose, under-eye area, and inner corners without over-applying.
- Tap-and-roll blending: A light “tap” (stippling) motion helps melt edges into skin—especially useful when you’re layering coverage.
- Easy to switch styles: It works for quick everyday makeup, and it still holds up when you want more precision (like cleaning up around the nostrils).
Dual-use: dry vs. damp application (and when to use each)
Using a sponge dry versus damp changes how product sits on your skin. Our team recommends choosing the method based on your formula and the finish you want.
- Damp use: Lightly wet the sponge, squeeze thoroughly, then blot. This is ideal for liquid and cream products when you want a smoother, more skin-like finish.
- Dry use: Great for pressing in powder, setting under the eyes, and adding coverage quickly when time is short.
- Concealer control: Use the pointed tip with small tapping motions so you don’t shift the base underneath.
- Blush/bronzer softness: Use the rounded side with gentle tapping to avoid harsh edges.
| Use mode | Best for | Finish | Helpful tip |
|---|---|---|---|
| Damp | Liquid foundation, cream blush, cream bronzer | More seamless, less cakey | Squeeze out excess water so the sponge doesn’t dilute product |
| Dry | Setting powder, baking, powder blush | More coverage and stronger pigment payoff | Press powder in, then lightly tap edges to soften |
Skin-friendly routine: gentle blending without dragging
Comfortable makeup starts with technique and hygiene. If you’ve ever felt like makeup tools were “scraping” or leaving irritation behind, switching to tapping and keeping tools clean can make a noticeable difference.
- Tap, don’t rub: Stippling minimizes tugging compared to dragging—especially around delicate under-eye skin.
- Clean tools matter: Old product residue can lead to uneven blending and can irritate skin over time. For skincare fundamentals, you can review guidance from the American Academy of Dermatology Association.
- Build in thin layers: Apply less product than you think you need, then tap to build coverage gradually for a more natural texture.
- Be mindful with sensitivities: If your skin is acne-prone or reactive, treat sponge care like skincare: keep it clean, let it dry fully, and replace tools when they start to break down.
And as a general rule, it’s smart to stay informed on cosmetic safety basics from sources like the U.S. Food & Drug Administration.
How to use the full 10-piece set effectively
Having 10 sponges isn’t just “extras”—it lets you separate tasks so colors stay true and finishes stay consistent. Our team’s simplest approach is assigning jobs and rotating through the week.
- Assign roles: Keep one sponge for foundation, one for concealer, and one for powder so you don’t muddy products together.
- Rotate to dry thoroughly: Switching sponges gives each one time to fully dry after cleaning (a big deal for comfort and performance).
- Separate warm pigments: Keep a dedicated sponge for cream contour/bronzer so those tones don’t tint your brightening areas.
- Use a fresh sponge for touch-ups: Light tapping can soften edges and refresh makeup without adding more product.
| Sponge slot | Suggested job | Why it helps |
|---|---|---|
| 1–2 | Foundation/base | Consistent shade and finish without leftover concealer brightening patches |
| 3–4 | Concealer/brightening | Cleaner under-eye blending and less creasing |
| 5–6 | Powder/setting | Avoids dampness mixing into powders |
| 7–8 | Cream contour/bronzer | Prevents warm pigments from tinting highlight areas |
| 9–10 | Backups/travel/touch-ups | Always have a clean option available |
Cleaning and care (to keep results smooth and skin comfortable)
Performance drops fast when a sponge is overloaded with old product. Keeping a simple cleaning rhythm helps your makeup apply more evenly and keeps the tool feeling soft on your skin.
Best uses: where this set fits into your makeup kit
More from our store
- How to Choose Perfect Etsy Tags for Maximum Sales – Ultimate Guide on Etsy Tags How to Choose Them for Boosting Visibility & Sales
- How to Ask AI for Help: Smart Ways to Ask AI for Help – A Digital Guide for Effective AI Interaction
- Smart Eating in Pricey Places – Travel Food Budget Guide | How to Eat Cheap While Traveling in Expensive Cities | Digital Download
FAQ
Should the makeup sponge be used wet or dry?
Use it damp for liquid and cream products when you want a smoother, more skin-like finish, and use it dry for powders when you want stronger coverage or setting power. The key is to squeeze and blot so it’s damp, not dripping.
How often should makeup sponges be cleaned?
Cleaning after each use is ideal, and regular thorough washing helps keep blending smooth and your skin more comfortable. Always let your sponge air-dry completely before storing it.
Why does my sponge leave streaks or soak up too much foundation?
Try using the sponge damp for liquids, apply foundation in smaller amounts, and tap instead of dragging across your skin. Also make sure the sponge is clean, since buildup can cause streaking and make the sponge absorb product unevenly.











Leave a comment